UAS Flight Proficiency Examination: Proctor Guide for PROPS Test (2026)
Chapter: Appendix A: NIST sUAS Open Test Lane Fabrication Guide

APPENDIX A
NIST sUAS Open Test Lane Fabrication Guide
Fabrication Guide
Open Lane Stickers for Buckets
https://drive.google.com/drive/folders/1QZilzTFnM8vjNq7CWaOfR1U-jZws8c4v
Fabrication of an Alternative to the NIST Bucket Stand
Materials needed:
- Two 1-inch × 6-inch × 8-foot wood boards
- Twenty 2-gallon buckets
- One box of 6- × 2-inch screws
- One box of 3⁄16- × 1¼-inch washers (approximately 20)
- Twenty 8-inch unfinished wood circles for crafts
- 60 pages of 8-inch large circle labels
- Drill with 3⁄32-inch drill bit
- Saw
- Screwdriver
Steps:
- Cut the 1-inch × 6-inch × 8-foot wood boards into eight, 45-degree parallelograms as shown in Figure A-1. The long edge should be 22 inches. Then, cut four of the 45-degree parallelograms in half, so that each has a length of 11 inches on the long edge.
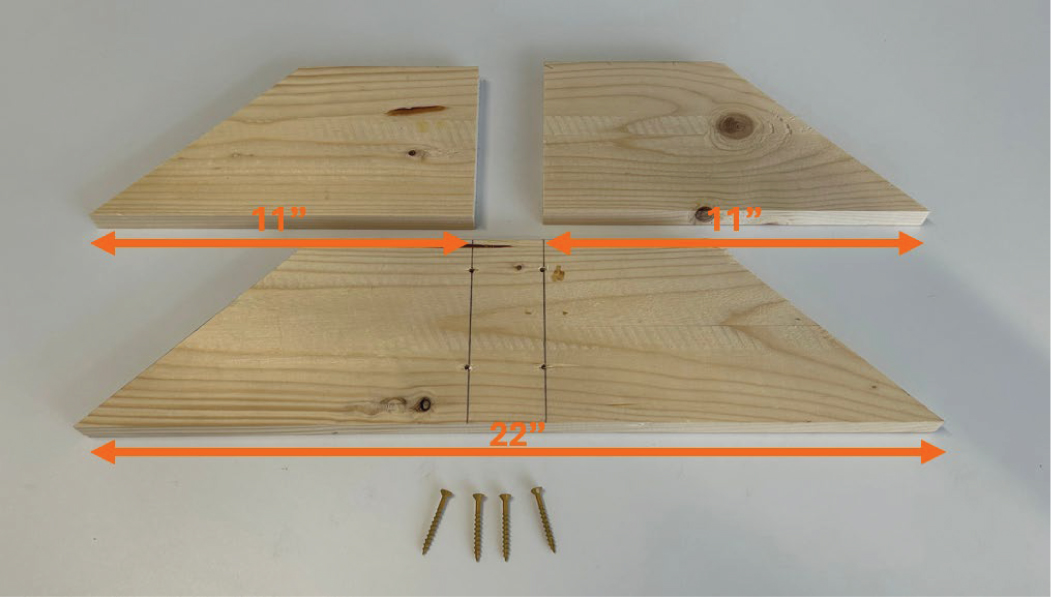
Long Description.
Three cut wood pieces and four screws are arranged on a flat surface. Two smaller wood pieces are at the top and each has a long edge labeled 11 inches. Below them is one larger wood piece with a long edge labeled 22 inches. Four screws are placed in a row below the wood pieces.
- Drill a 2-inch deep pilot hole in the middle of the angled edge of the cut boards using a 3⁄32-inch drill bit. Then drill a pilot hole at the top of the long parallelogram in the middle. (See Figure A-2).
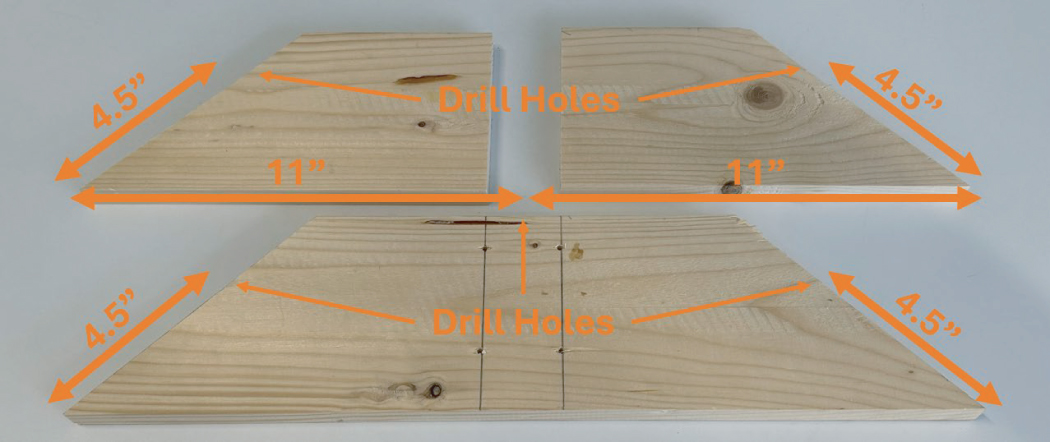
Long Description.
Three cut wood pieces are arranged on a flat surface. Two smaller pieces are at the top, each with a long edge labeled 11 inches. Drill hole locations are marked on the outer edges of the sides of both top pieces at 4.5 inches from the corner. Below these two pieces is a larger angled piece the same size as the two top pieces, with drill holes labeled on the outer sides of the angled edges at 4.5 inches from the corners.
- Drill two holes vertically in the 45-degree parallelograms at 10 inches from either end and approximately 1½ inch from the top and bottom (Figure A-3). The hole should go through the board.
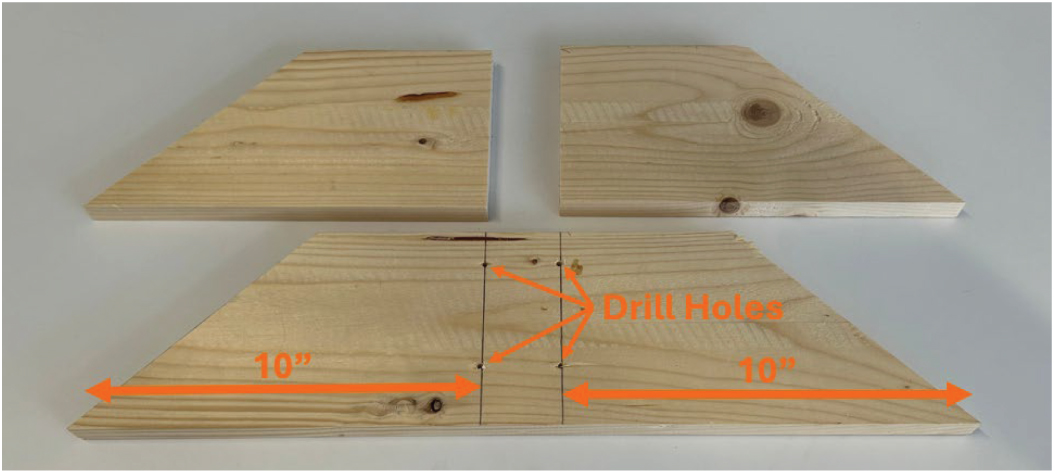
Long Description.
Three cut wood pieces are arranged on a flat surface. Two smaller angled pieces are at the top. The larger angled parallelogram at the bottom is marked for two sets of drill holes 10 inches from either edge.
- Line up one of the short parallelograms behind the vertical holes. Use a drill to drill a pilot hole through the large parallelogram and into the short parallelogram. Then screw the parallelograms together (Figure A-4). Repeat the process for the second vertical hold.
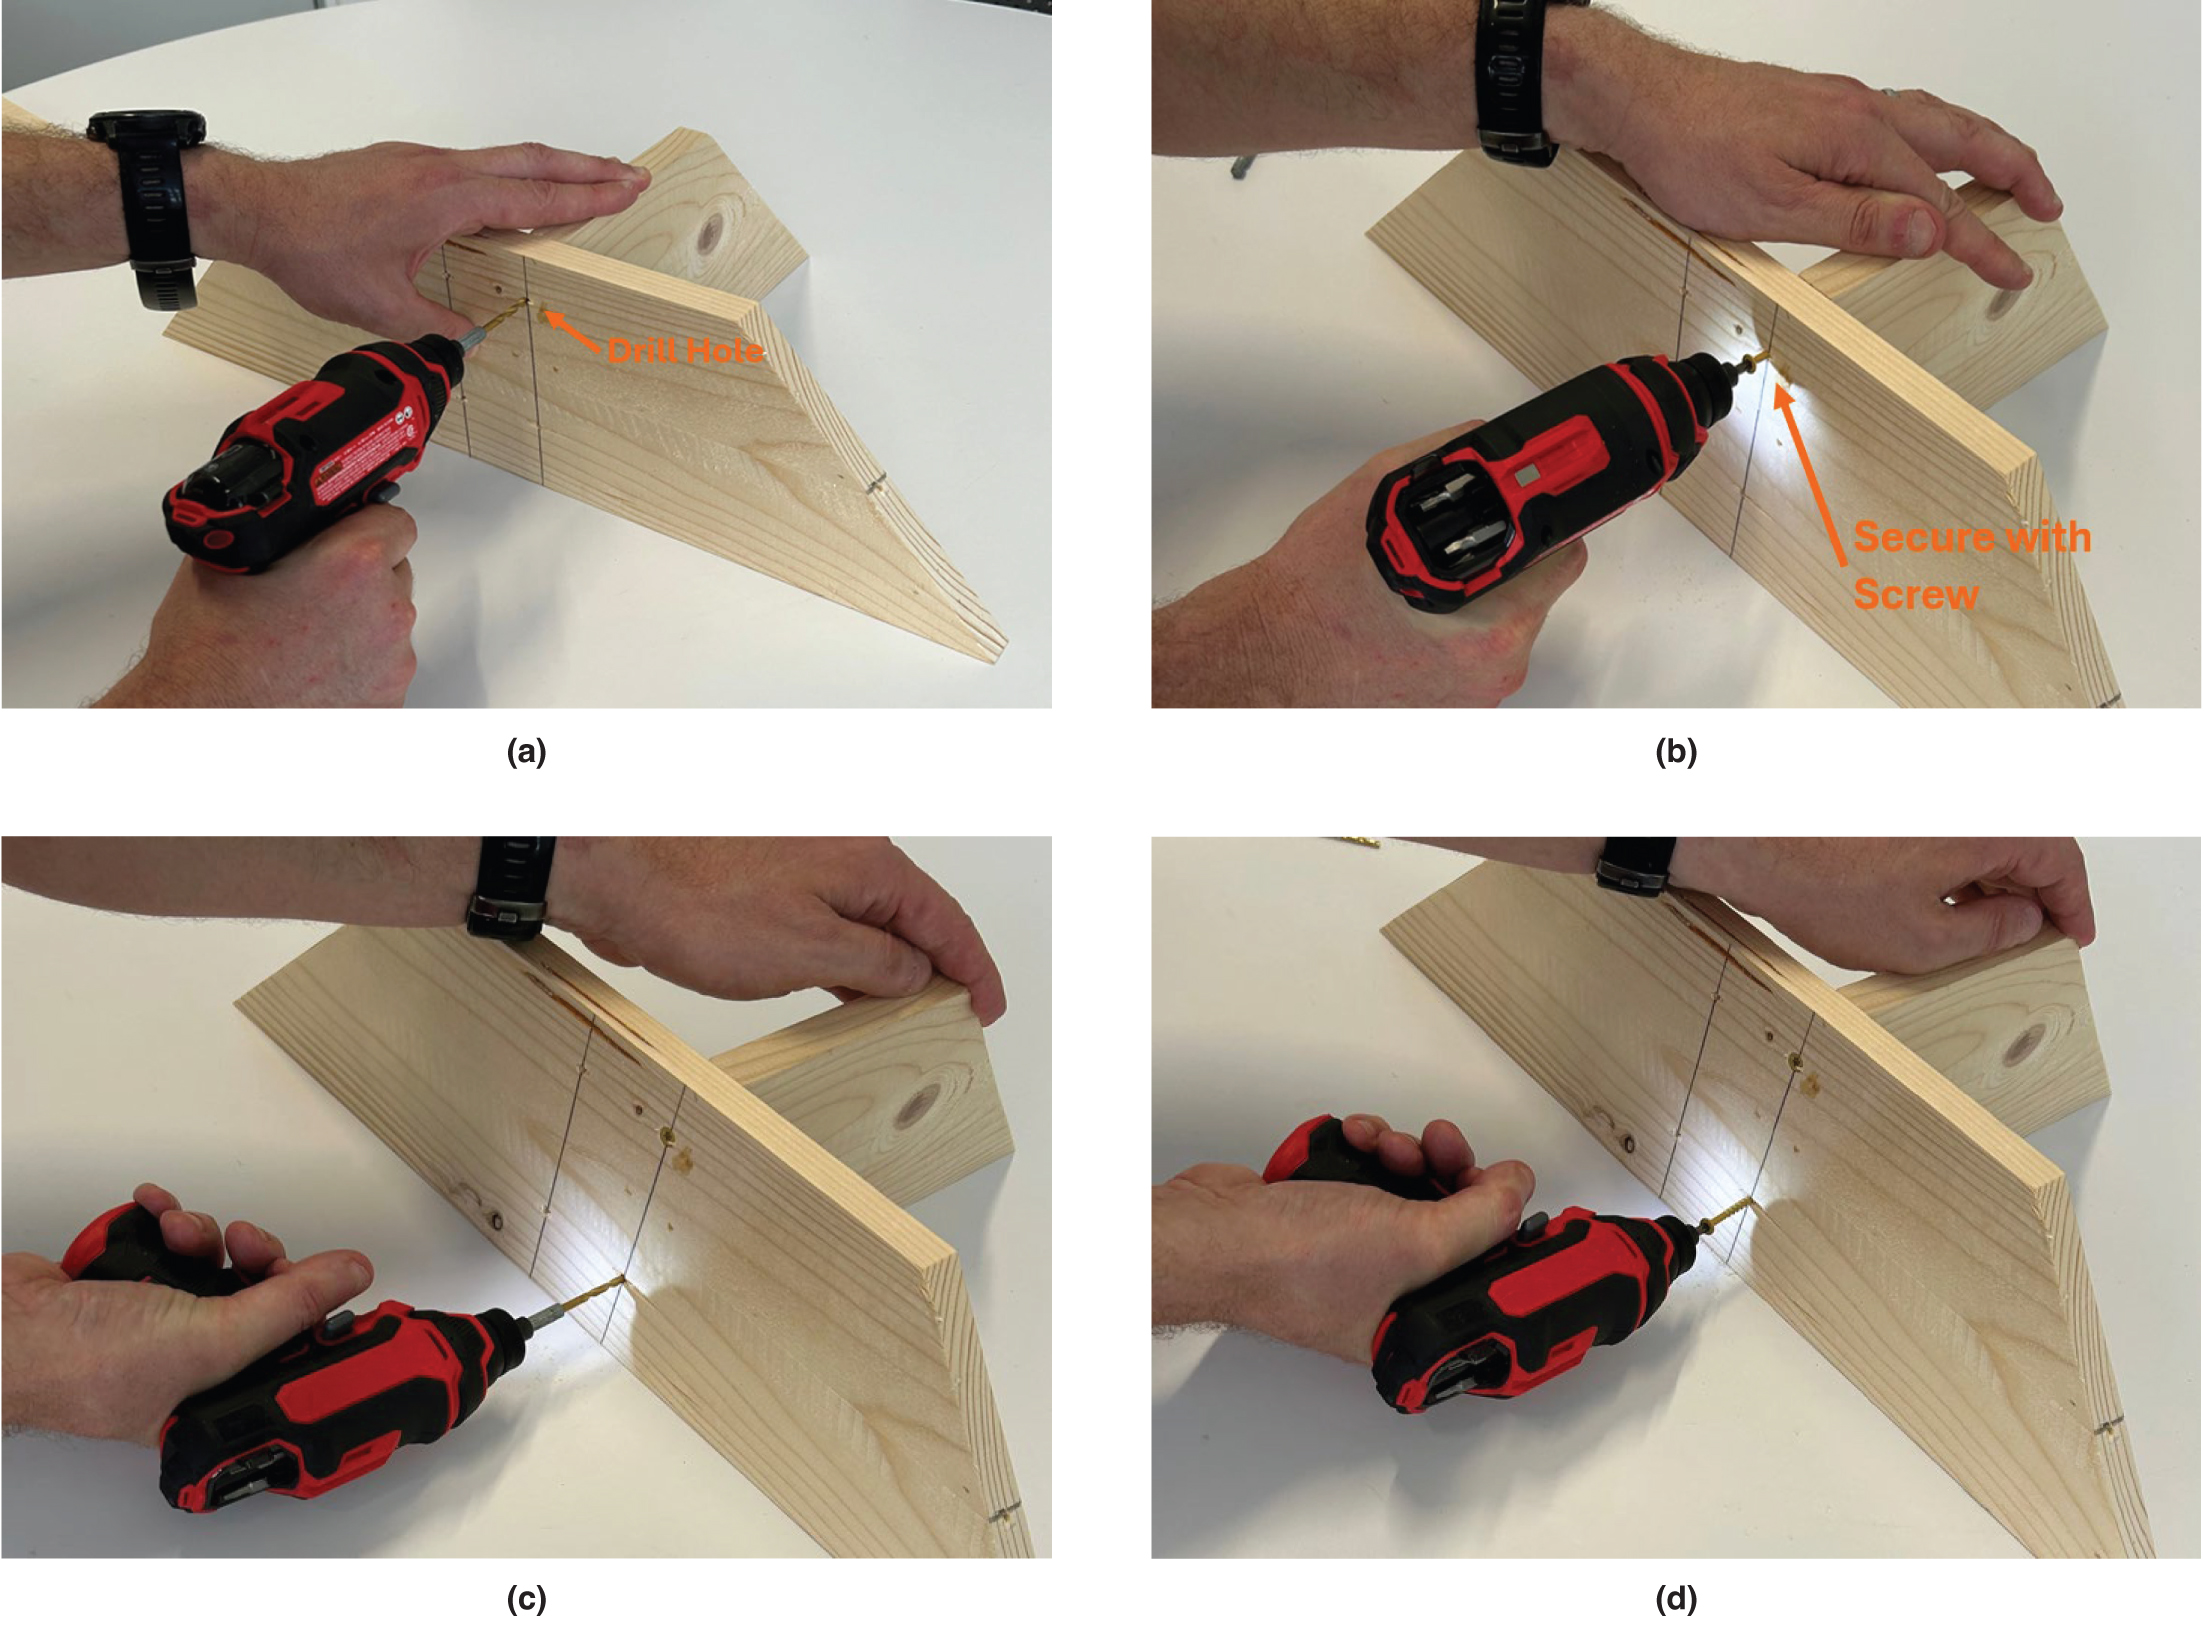
Long Description.
Four photos show how to join two parallelograms together: (a) A person holds two joined wood pieces and uses a power drill to make a pilot hole at the marked center edge of the upright piece. (b) A person steadies two angled wood pieces and uses a power drill to drive a screw through the marked center edge to fasten the pieces together. (c) A person holds two angled wood pieces and uses a power drill to drive a screw through the marked lower hole to secure the pieces together. (d) A person holds two angled wood pieces and uses a power drill to drive a screw into the lower marked pilot hole to fasten the pieces together.
- Now, repeat the process in Step 4 to attach the second short parallelogram to the NIST bucket stand (Figure A-5).
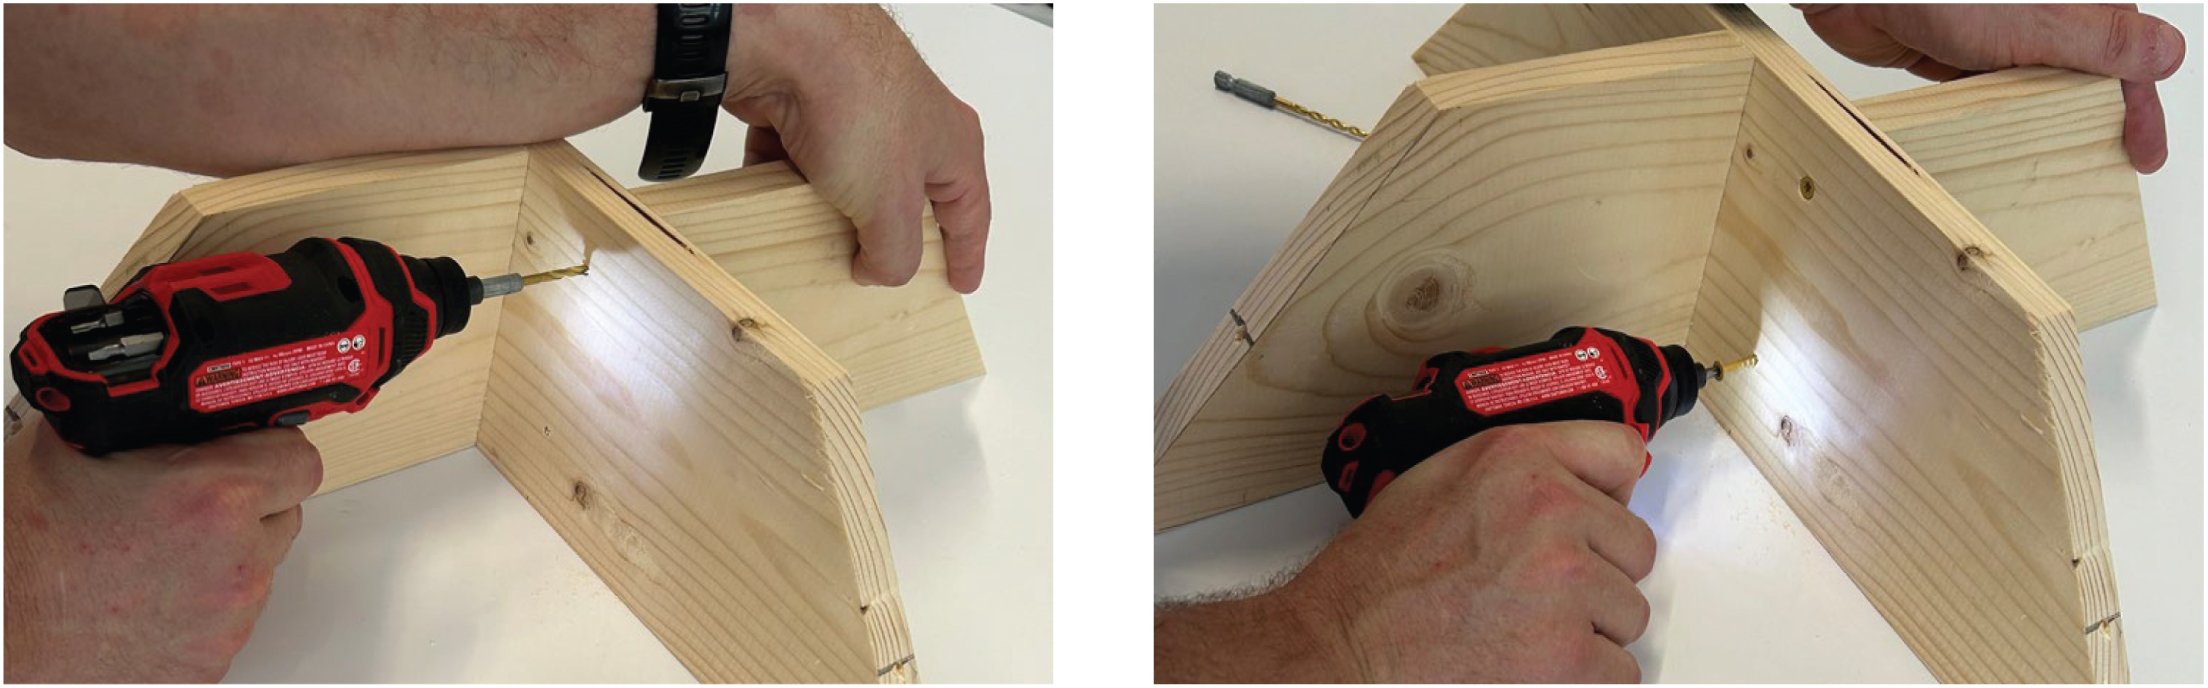
Long Description.
Two photos show how to attach the short parallelogram to the NIST bucket stand: (a) A person holds two joined wood pieces and uses a power drill to drive a screw into the upper marked pilot hole to secure the pieces. (b) A person steadies two angled wood pieces and uses a power drill to drive a screw into the lower pilot hole to fasten the pieces together.
- Drill a hole in the center of the bottom of the bucket (Figure A-6).
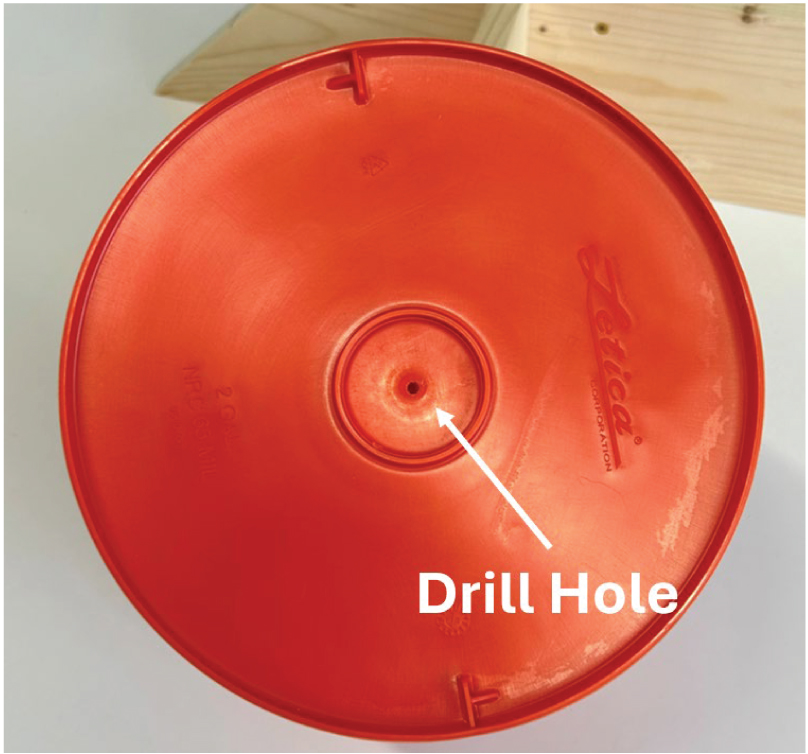
- Use screws with washers to attach five buckets to each of the bucket stand sides (Figure A-7).
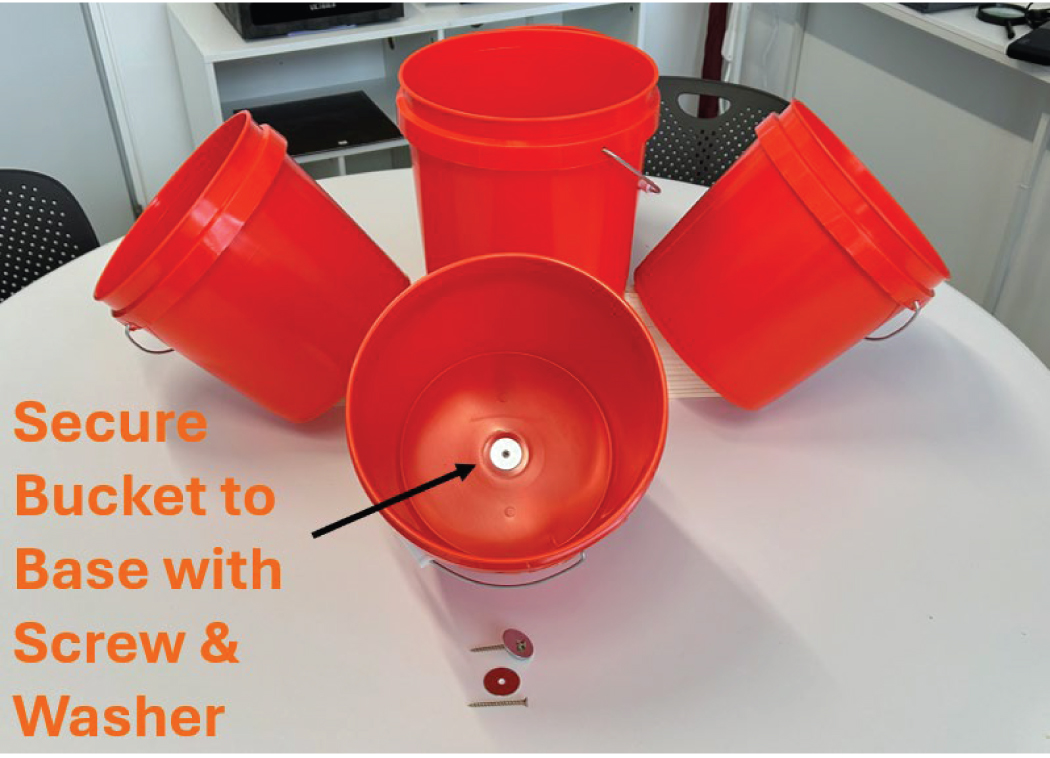
Long Description.
Four plastic buckets are attached to the wooden base of the bucket stand, angled out. The bottom bucket shows the screw and washer used to attach the bucket to the wood base through the center hole. An arrow pointing to the base of the bucket is labeled "Secure bucket to base with screw and washer." Beneath the buckets are two sets of washers and screws.
- Print NIST stickers on 8-inch circle sticker paper and attach them to the 8-inch wood rounds. Insert the wood rounds into the appropriate bucket.


